
How to Order a Wedding Album:
So, you're married, and you LOVE your wedding photos - but now what? Photos simply don't look as good anywhere else as they do in print (the reactions I get from couples when I deliver their wedding albums to them speaks to this in volumes!) so you might wish to consider ordering an album for yourself - Which might seem like a massive task at first, but as I hope to show you in this article, it's much more entertaining that it is a chore.
1) Choose your images
Okay so this is the only really tricky bit of the whole process. My wedding albums, as standard, have 30 pages (15 double page spreads) and will typically hold around 85 photos. You can however, add extra pages to the album to take more images. There's a very small additional charge per page, but it means you can have an album that's 100% bigger for less than 40% more cost. The biggest album I produced last year was 225 images and 74 pages!
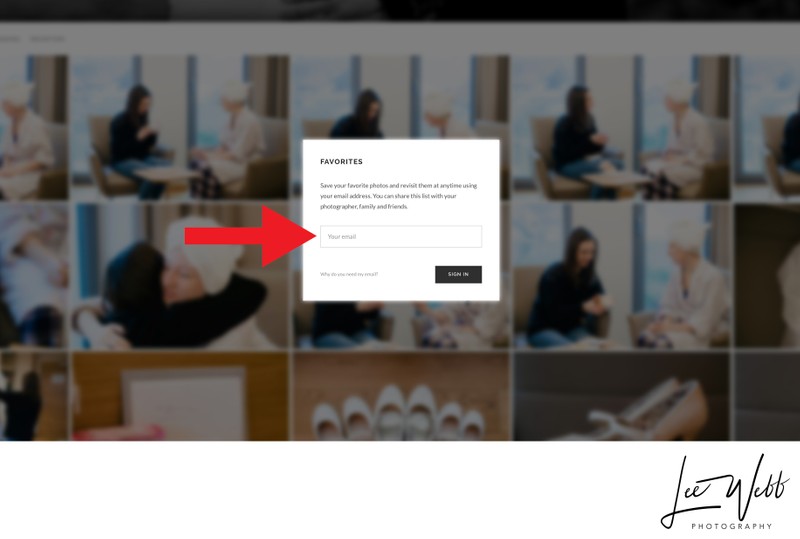
The first thing you'll need to do is login to your online gallery, and a create a new favourites list by clicking on the small heart shaped icon in the top right corner of the screen, and then enter your email address if prompted.
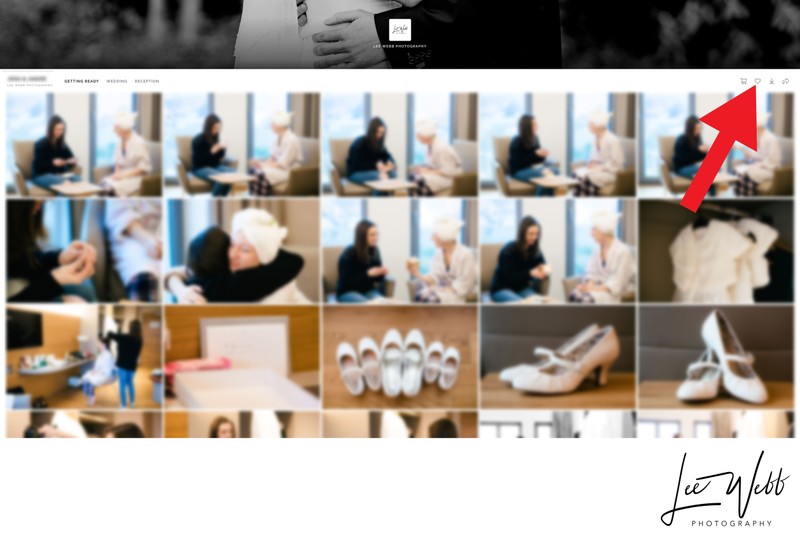
If you have already created a favourites list, you can start a new list and call it something helpful like 'wedding album'
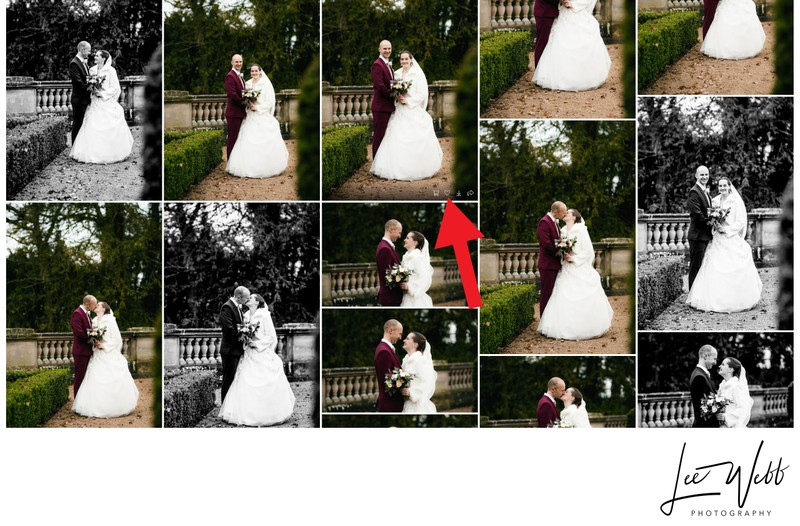
From there, all you have to do is go about selecting the images you'd like to include in your wedding album. Adding images to the favourites list is easy - all you need do is tick the little heart icon at the bottom of the image you'd like to include, and you'll see a confirmation message saying that it's been added to the folder.
It's likely that you'll go through the all of your photos and end up with a lot of images. Some of them are likely to be similar to others, but if you really can't whittle them down any more, don't panic - send me the list of images (which I'll come on to in a second) and I can help with the decision making process if you'd like.
2) Let me know which images to use!
Once you've done everything above, it's time to let me know that you'd like an album and that you've already selected the images you'd like to use.
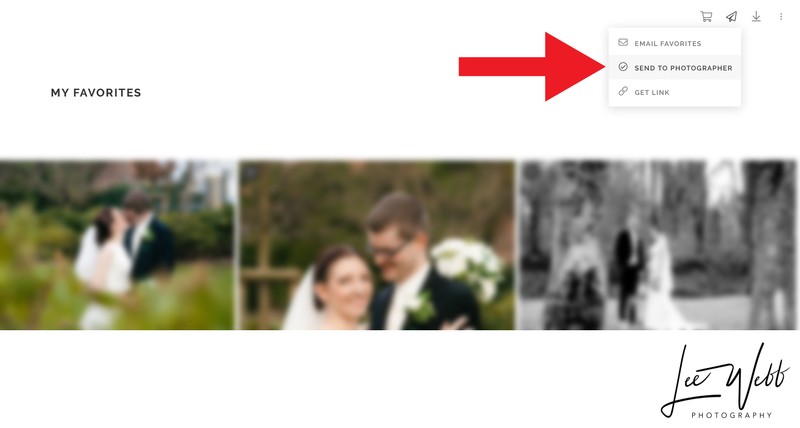
In the favourites album you've created in the online gallery, go to the top right corner of the page and click on the little paper aeroplane icon, and click 'send to photographer'.
3) Choose which size album you would like
The two standard sized albums I offer are A4 landscape and 30cm square. If you're having a hard time picturing the physical size of the album, lay two pieces of A4 paper out in front of you with the two shortest sides touching - this is how wide an A4 landscape album opens to. For the 30cm square albums, picture an album as tall as the two pieces of A4 paper are wide.
4) Pick a cover option
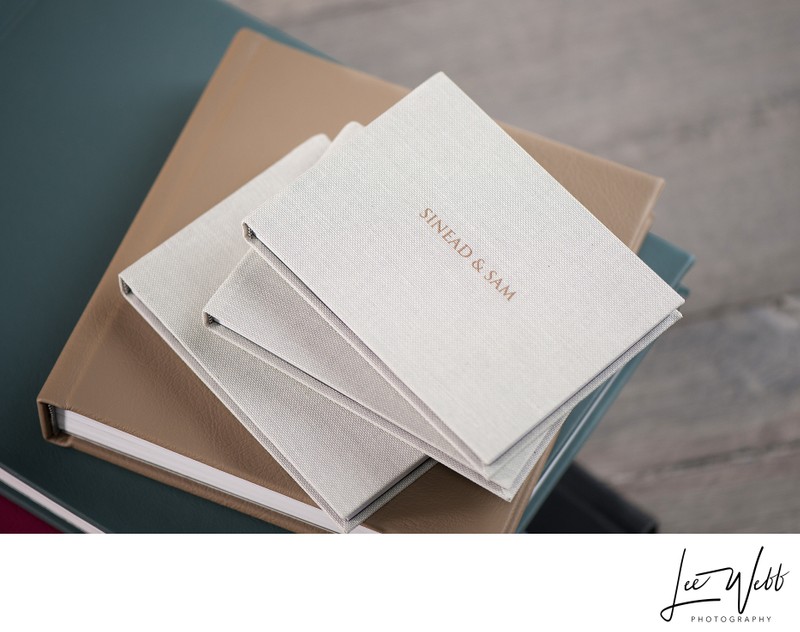
There are several cover options for the wedding albums I produce, with the most popular being the acrylic cover (whereby an image is set behind what looks like a thin piece of glass - most of my demonstration albums have this option so you've likely already seen one if we had a face-to-face initial meeting.) The other popular option is either a full leather or linen wrap, where you can have your names and wedding date embossed into the material. You can have 'blind' embossing as seen in the two photos below, or can have an embossed coloured foil such as gold or silver.
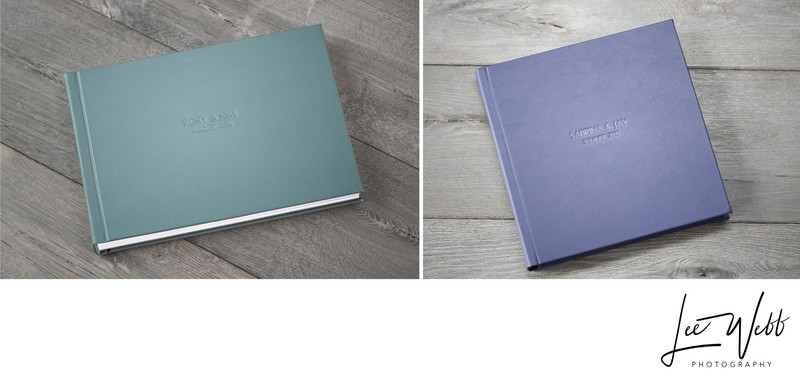
Above: A4 album (left) and 30cm square album, both with leather wraps and embossed writing.
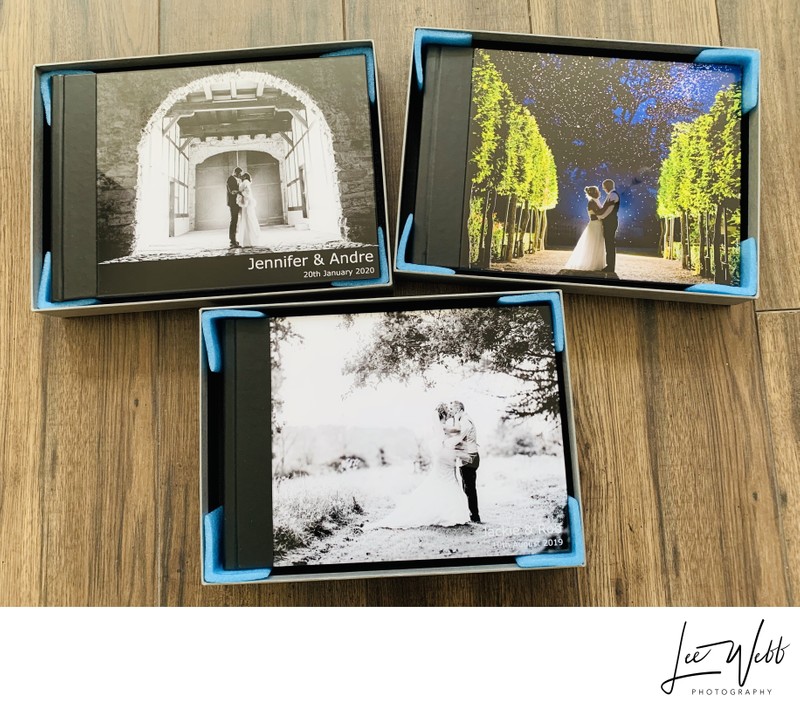
Below: Three A4 albums with acrylic covers, waiting to be sent to customers.
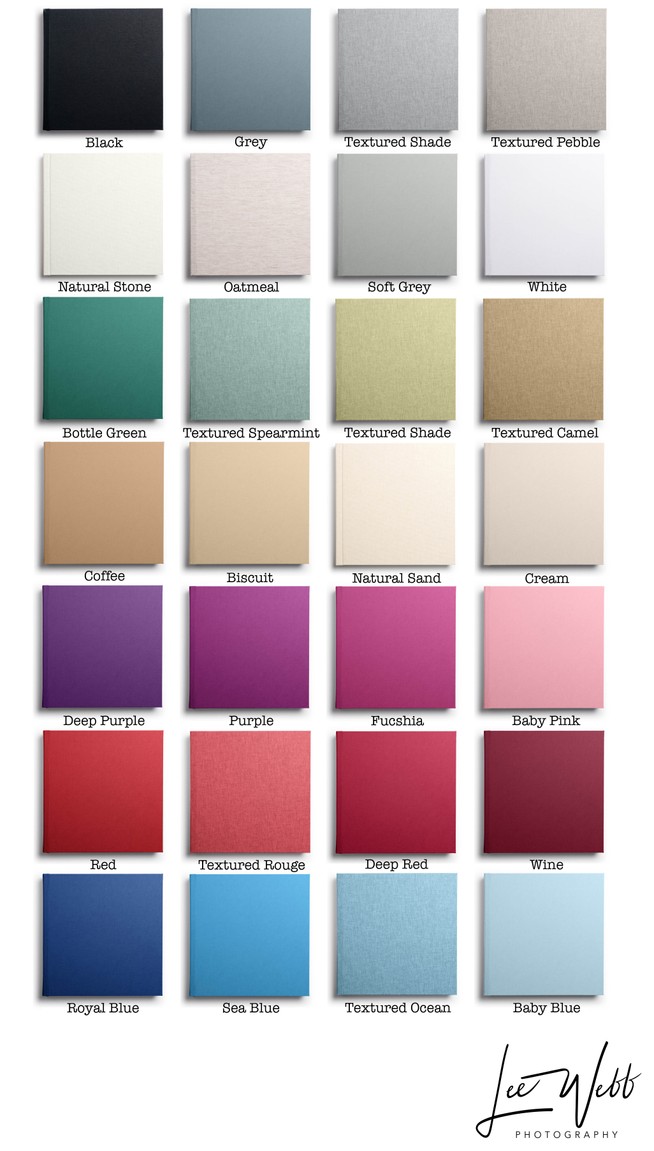
5) Pick a wrap/binding colour
If you have chosen a linen or leather wrap for your album, the next thing to do is go about picking out which colour you'd like the album bound in. If you're going for an acrylic front cover, you still need to choose which colour you'd like the spine and back cover. Below are the colour swatches produced by the lab I use:
Leather: (Acrylic covered albums must be bound in leather, not linen. There are some vegan friendly faux leather options too, but sadly these are currently only available in fewer colours. Drop me an email for more info.)
Leather:

Linen:
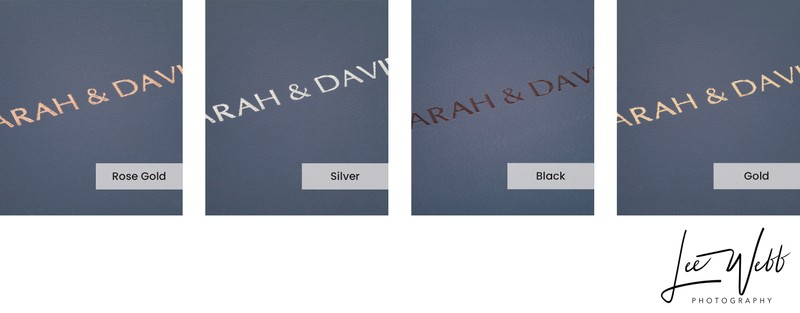
If you're going for an acrylic-cover album, I'm usually able to include your names and dates on the image that's then sealed within the cover. If you're having a wrapped album, whether that's leather or linen, you'll need to let me know what you want the album to say, and how you want it to look. Most couples choose to go with their first names and the date below. The text can either be blind embossed (whereby the details are simply pressed into the cover) or embossed and coloured - examples of which are given below on a navy blue leather-wrapped album:
7) Would you like a smaller copy for your parents?
Parent albums are available, traditionally using the same artwork and design as the main album. Parent albums are half the size of the main albums, and can be ordered in the same colour scheme too. Whilst there's a small additional cost per page for main albums, for reasons I can't explain, the parent albums always cost £125 whether there's 30 or 65 pages!
You can order parent albums with different images or a different design to your main album, but a small surcharge will apply.
8) What happens next?
Once you've let me know which images you've chosen, the size of the album you'd like, your cover and binding option and how you'd like the text to appear (if you're having a full leather or linen wrap) it's time for me to set about designing your wedding album. I use state-of-the-art design software to organise your wedding album, and as soon as the initial design is completed, I'll send you the design as a series of images that you can flick through at your leisure. Below is an example of how the initial design will look:
And that's it!
As soon as you sign off the design I'll place the order with the lab. Current production times are 2-3 weeks so if you're really on it, you could have a wedding album in your hands in as little as a month from the time you read this!